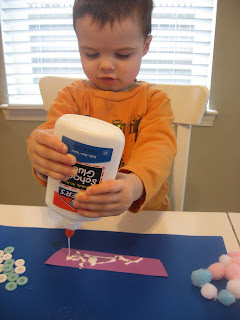
Hard and Soft
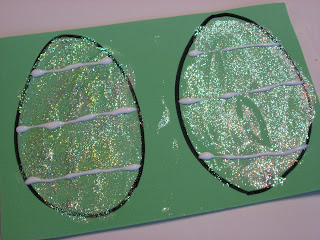
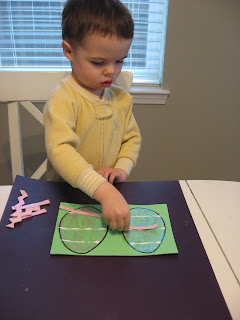
Easter Egg !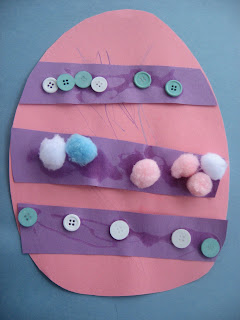

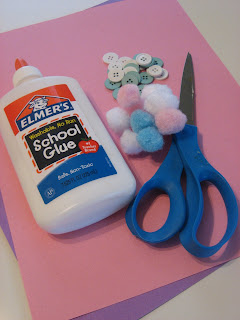
- Gather your materials. You will need 2 sheets of construction paper in different colors, some buttons , pom poms , pencil crayons or chalk, glue and scissors.
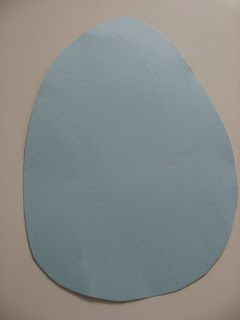
- Cut one sheet of construction paper into a large oval.
- Have your child color the egg to their liking. Pencil crayons and chalk both make pretty light and muted marks that won’t over shadow the rest of the egg. But if you want to use markers go for it !

- While they are coloring, cut some stripes of paper from the other sheet.
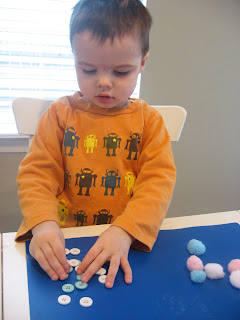
- When they are done introduce the buttons and pom poms. Ask your child to feel them, tell you how they feel and if they are the same or different. With older children this is a great time for them to make practice patterns before making them permanent.
- Hand them the stripes and glue.
- Add the collage materials one type at a time.
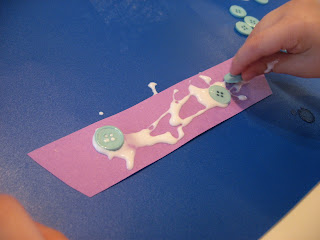
- Keep going until they are satisfied- I cut out 4 stripes but my son was done with 3.
- Let the stripes dry
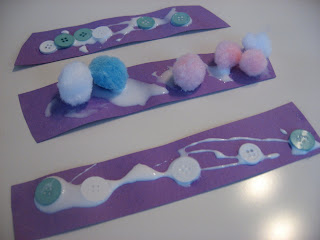
- Glue onto the egg and trim the ends if needed.


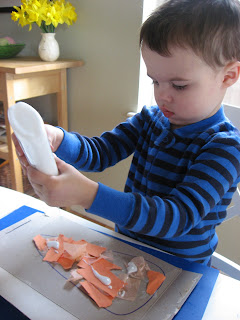
Collage Carrot !


- Gather your materials. You will need some orange paper and tissue paper, some heavy paper or a discarded cereal box, a marker, scissors, glue and a handful of green Easter grass.

- Start by drawing a basic carrot on your cardboard/ heavy paper with the marker.
- Next hand the paper already ripped in long strips to your child to rip into smaller pieces. my son needed some guidance here but got it after a few tries. He wanted to ball them up first.

- While they are ripping, cut some orange tissue paper into small squares.
- Time to add the glue. If you are apprehensive about allowing your little ones to handle the glue this is a great project to let them try since they don’t need to be precise at all.

- Add the paper and tissue paper.

- Add more glue if needed
- Add more paper.
- Glue the Easter grass on the top , let dry.

- Cut out and enjoy. We’ve been feeding a stuffed bunny our finished carrot all day.


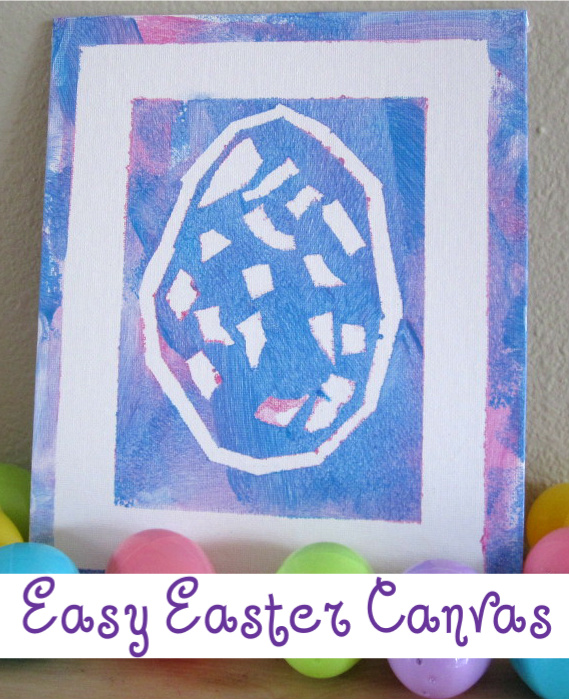
- Gather your materials. You will need a canvas ( the tape pulls off it like a dream! ), a roller sponge brush, painters tape, scissors, a plate, and paint.

- Start by making a frame in tape. Press hard.

- Now make the outline of the egg. I did these steps, elementary aged kids should be encouraged to try though.

- Invite your child to come add the flair! Rip small pieces of painters tape and press them onto the canvas inside the egg.

- The ripping is fun and great for fine motor skills.
- When they have added all the tape pour some paint on the plate and roll!

- Add new colors as the mood strikes!
- Get the edges too.

- Set aside to dry.

- When dry pull the tape off.


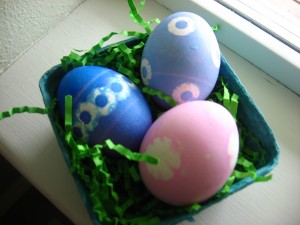
Polka Dot Easter Eggs
- Gather your materials. You will need some cooled hard boiled eggs, paper to protect your table ( we have some cardboard under the newspaper, stationary stickers, dye and a dye hook.

- Get everything prepped before inviting the kiddo to the table- dye is not something you want “help” with.
- Add your stickers. These reinforcements worked ok, but were really hard to get off once dry.

- This lace pattern was my favorite.

- My son wanted to make a happy face ( this was the egg that broke and turned into part of his lunch).

- The circle stickers were much easier to take off.
- Dye your eggs.

- Add in a color mixing lesson too! We added the blue to this pink after to make purple.

- Let dry and remove the stickers. Some came off easily, some did not.

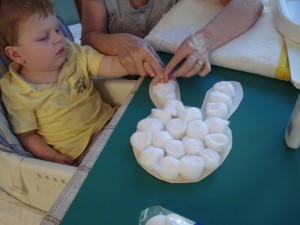
Cotton Ball Bunny
This is a great, easy activity that you can do with your child if they have the motor skills or you can create it and then share it with them if they don’t.
You need a heavy piece of white paper, cotton balls, scissors, and glue.
1. Cut out the shape of a rabbit out the white paper. If your child is able, you can have them do it themselves.
2. Sit down with your child, add a line of glue, and then add the cotton balls. We also practiced taking turns for this activity. We had to move Charlie’s arms into the position at first, but he quickly got the hang of dropping the cotton balls into place.
3. Cover the paper with cotton balls. We took turns since Charlie can be a little slow all by himself.
This activity could easily be done with almost any animal and cotton balls of all colors are available at craft stores.
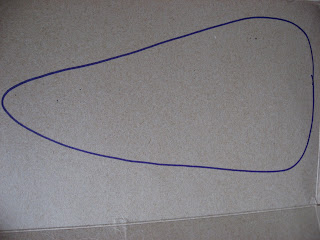
Easter Craft : Felt Carrot Bag
This is not a craft you can do with your child. This is a naptime craft or something you can do with a much older child. This craft is for the little kids, not with them. This idea was inspired by this bag of candy. Too cute!
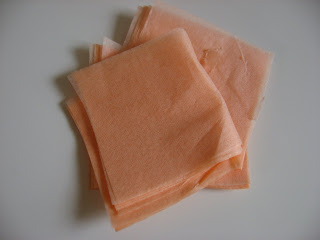
I used a piece of orange felt, green felt, green bias tape (you can use yarn or any green string), a hot glue gun, and scissors. I suggest using felt. I originally tried this with orange quilter’s cotton and it was way too thin to hot glue. If you want to sew you can use the cotton, but this is a no-sew version that anyone can do. Literally anyone.
I folded the orange felt piece and trimmed the outer edge to make a triangle.
I hot glued the open side together to make a cone.
Then I cut the green felt in half, long ways.
Next I glued the green felt piece to the orange cone. I just glued about an inch at a time and rotated my way around the entire edge of the cone.
After that I cut strips into the green section. Be sure not to go all the way down to where it connects with the orange.
I cut some holes (more like diamond shaped snips) into the cloth with scissors and threaded the biased tape through the holes. This way it will be easier to re-thread when your child pulls the string out. Which we all know is going to happen.
Fill your cone with candy, trail mix, craft supplies, or whatever goodies you choose. Tie the string together. Ta-da!
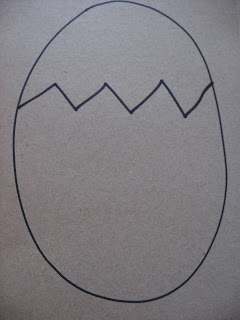
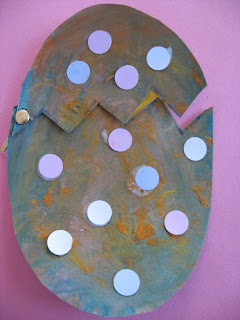
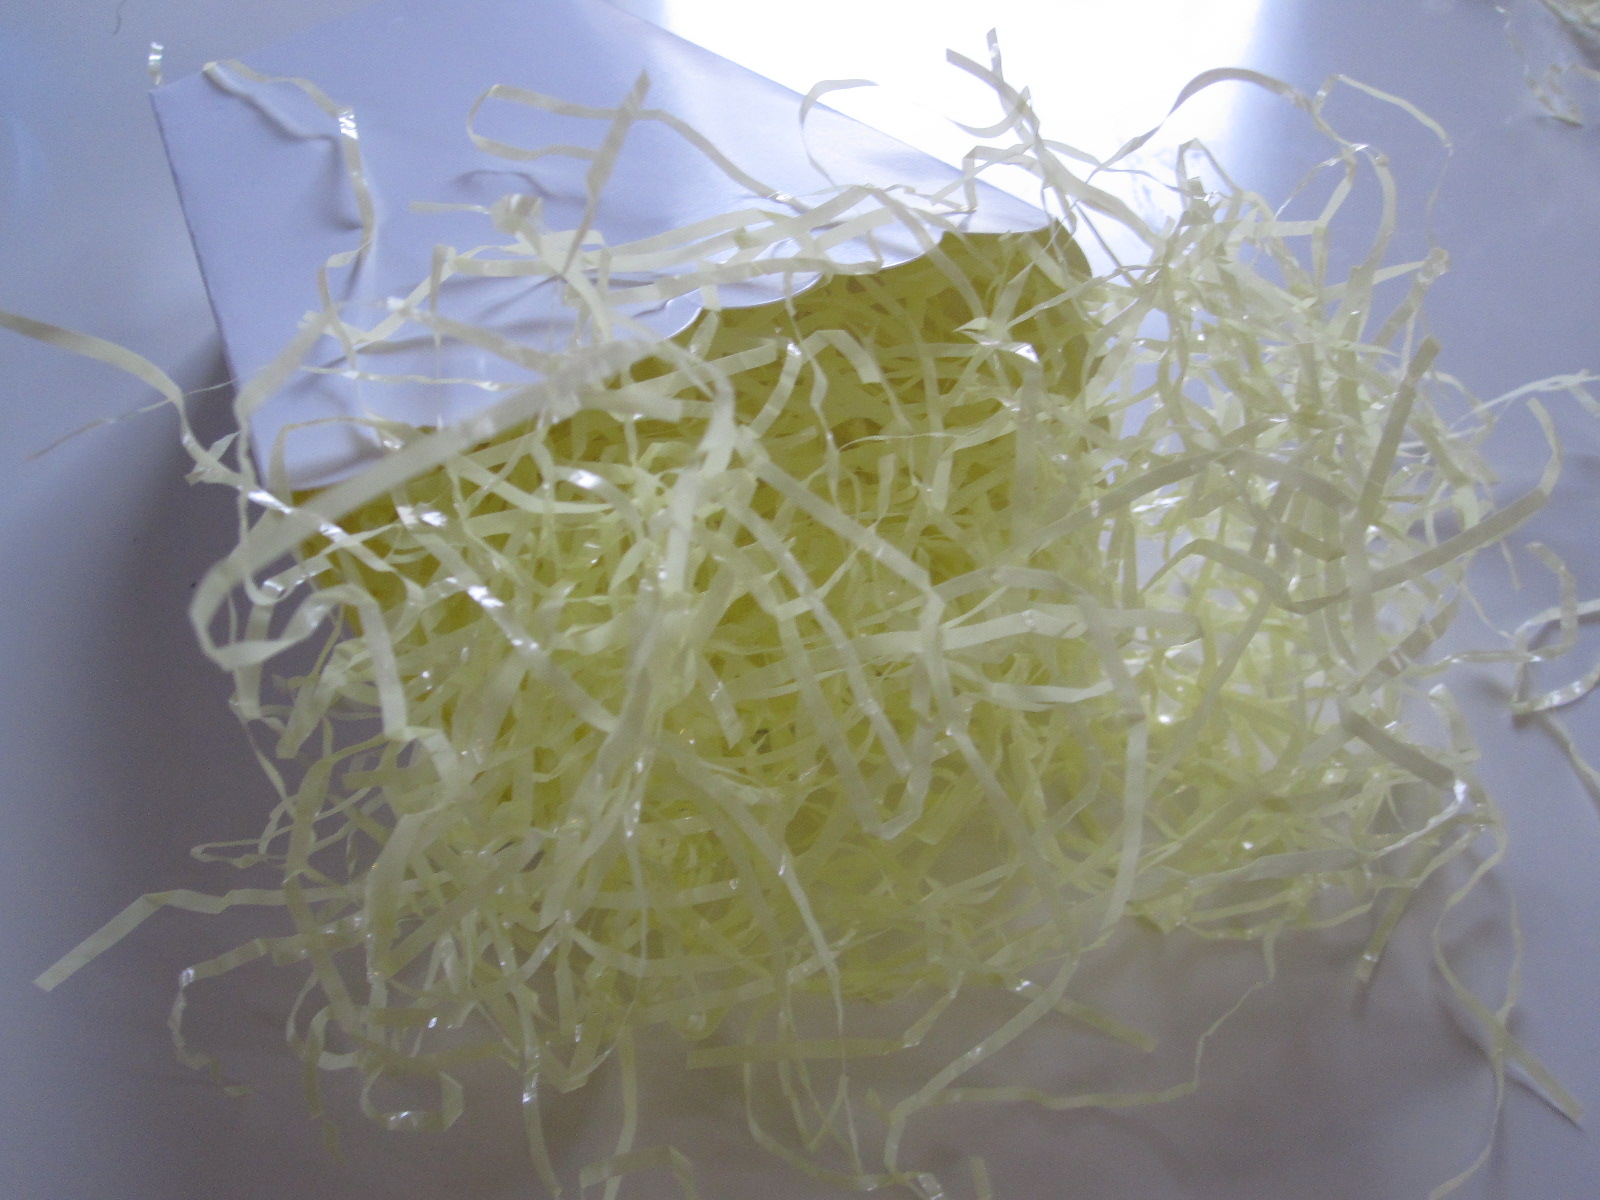
Peek – A- Boo – Eggs !

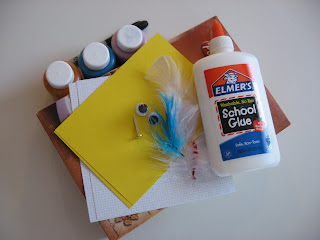
- Gather your materials. You will need some cardboard, paint, glue, paper in yellow for the chick, and pastels for the dots, a paper fastener,marker, scissors, a feather , googly eyes or buttons and some tape.
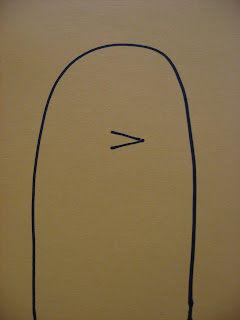
- Start by drawing an egg on the cardboard with a zig zag break in it.
- Have your child paint this. Try to stick with light colors, we used pretty dark ones and it made our egg look more dinosaur than Easter… Let dry.
- While they are painting draw a simple chick on the yellow paper.
- Add eyes a beak and a feather – I taped the feather on.

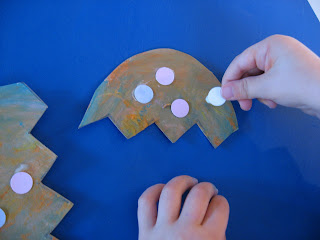
- Cut out small circles for decorating the egg- I used scrap card stock.
- When the egg is dry cut out
- Add your glue for the card stock dots
- Add the dots, let dry.
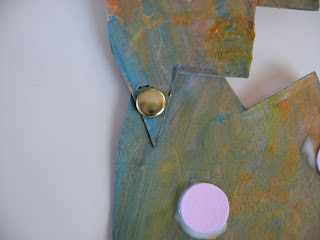
- Poke holes in both the top and bottom egg shells and thread the fastener through.
- Add your chick, again I used tape.
- Open
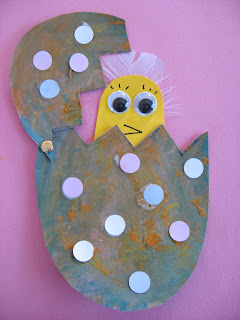
- Close


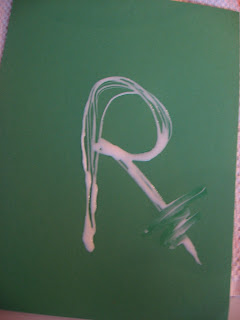
Rabbit R !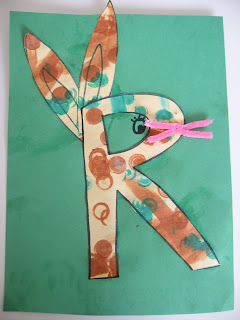

- Gather your materials. You will need 2 pieces of construction paper, a pipe cleaner, a marker, glue , scissors and some paint.
- Draw a large R and some rabbit ears on your construction paper.

- Have your child paint the R and the ears.
- Cut the R and ears out, snip the pipe cleaner in half and twist to make whiskers.

- I made a R out of glue
 .
.
- Add the ears and whiskers on.
- Let dry!


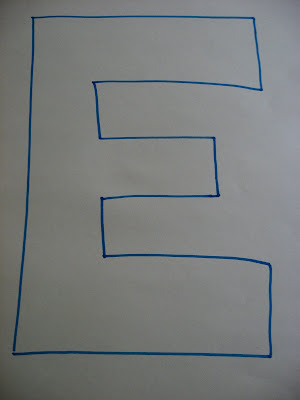
Easter Egg
E !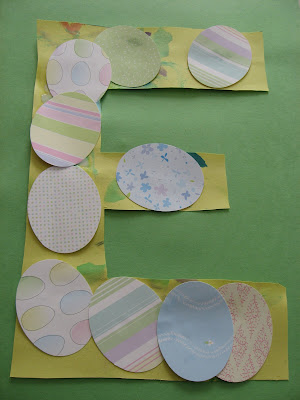


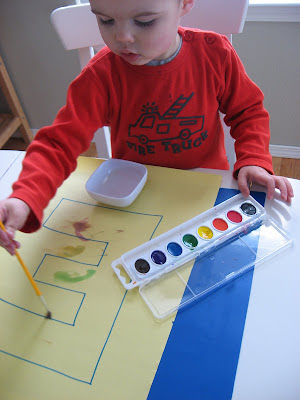
This activity allows children to experience how different materials work with glue and paper. Although simple to adults, children can learn many things about texture, thickness and any other attributes that the chosen materials have. Don’t limit yourself to tissue paper, use ribbon, rice, dried beans or pasta even. Older children can even make patterns !


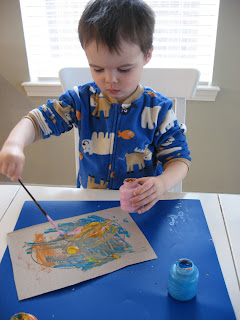
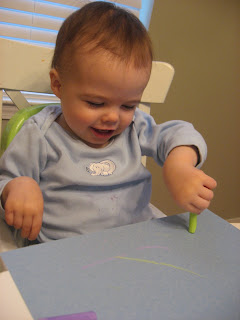
- Gather your materials. You will need 2 pieces of construction paper, some fancy card stock( or regular old colored paper of any sort) scissors or a oval paper punch, glue, water colors and a marker.
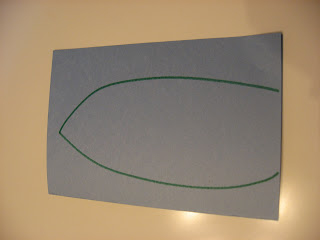
- Write a large uppercase E on one piece of construction paper.
- Have your child paint the E to their liking with the water colors.
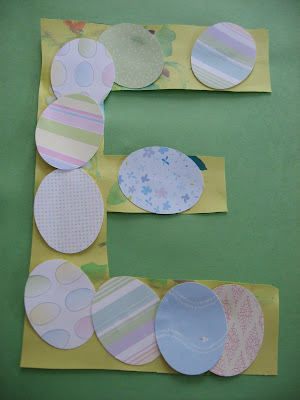
- While they are painting cut out multiple eggs from the fancy paper.
- When your little Picasso is done add the glue.
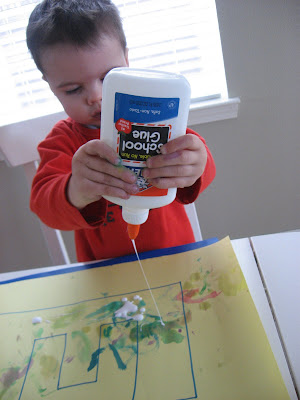
- Add the eggs, my son was so speedy with this I barely got a photo!

- Let dry
- Cut the E out and Glue to the 2nd piece of paper.


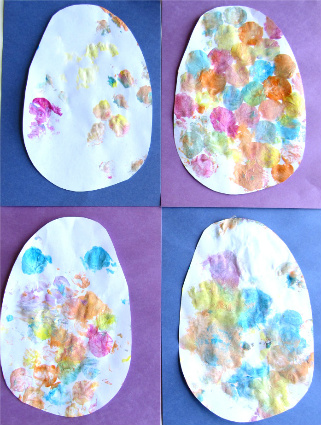
- Gather your materials. You will need some paper, bubble wrap ( the big ones works well), paint, a tray or plate for paint, brushes ( love ours from craftprojectideas.com ) , some painter’s tape , scissors and if you want to display it a few sheets of construction paper and glue.

- Start by cutting out some paper eggs.

- Next attach the bubble wrap to the table.

- Dish out the paint.

- Mix.

- Paint the bubble wrap.


- Print the paper on.

- Voila !

- Glue to construction paper and you have a super easy Easter craft for all ages.
Easy Easter Treats
Carrot Cupcakes
- Gather your materials. Grab your favorite carrot cake and cream cheese icing recipes or boxed mix and a tub of icing, orange and green jelly bellys . I should note that although I did use a mix I also mixed in 1/4 cup of crushed pineapple and it was very very yummy.
- Bake and cool your cupcakes.
- Ice them and add your jelly beans in the shape of a carrot!

Frozen Yogurt Eggs
- Gather your materials. You will need a silicone mini cake pan ( they still have Easter themed ones at both Target and Walmart in my area), a blender, low fat vanilla yogurt, and frozen or fresh fruit of your choice.

- Pop 2 scoops of the yogurt in ( about 3/4 cup) and 1/2 – 3/4 cups of the fruit.

- Blend

- Pour

- Freeze ( we froze ours for 2 hours and they were perfect- formed but not rock hard.) If you freeze them longer just let them thaw for 30 minutes in your fridge before serving them so they are soft enough to eat with a spoon.

- Pop out of the mold and enjoy !

- Gather your materials. You will need some white and colored mini marshmallows, construction paper, glue and a marker.

- Start by drawing an Easter egg on your paper.

- Add glue along the line.

- Add your white marshmallows along the edge. We did 15 then ate one, 21 then ate one , and 17 and ate one.

- Next ask your child how many stripes they want.

- Add your colored marshmallows. We decided to add a sorting element by saying the lines can be any color, but it must be all one color.

- Keep going!

- Let dry.
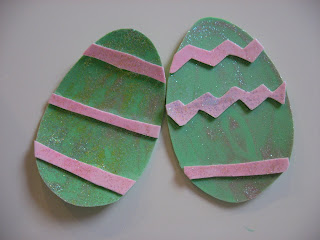
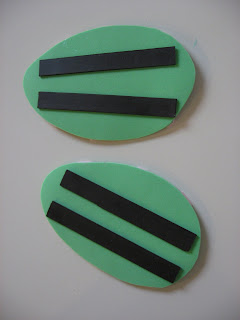
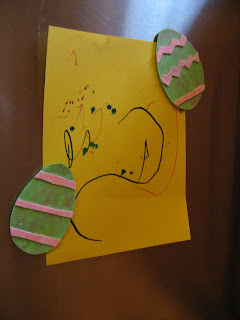
Easter Egg Magnets
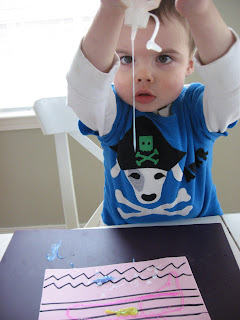
- Gather your materials. You will need some foam sheets, we used 2 colors but use as many as you have or want, some glue, a few colors of glitter glue , scissors and magnetic tape.
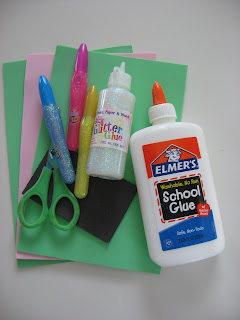 * word of caution when doing things with magnets and your children. Magnets can be really dangerous if swallowed so I always use these large pieces and make sure they are far too big to fit in a child’s mouth. Even when you think they are over the stick it all in my mouth stage, they will surprise you and it’s not worth the risk.
 - Start by drawing an oval or two on a sheet of foam with a marker.

- Have your child use the glitter glue to decorate, they don’t need to be exact or careful. A lot of glitter glue is tough to squeeze but if your child is anything like mine they will insist on doing it themselves.
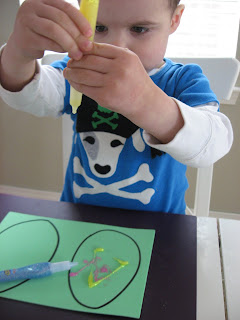
- While they exert their independence and get glitter all over the egg and themselves, draw some lines and zig zags on a second sheet of foam.

- Rub the glitter around to spread it, not only will this look cool , it cuts the drying time.

- Decorate the 2nd sheet with glitter as well.
- Let dry
- Cut out the stripes and zig zags
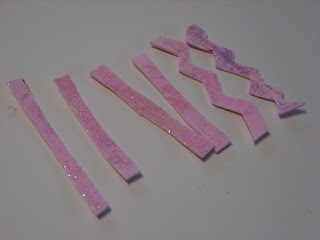
- I added the glue in strips
- Add the stripes and zig zags and let dry.
- Cut out the eggs

- Add the magnets


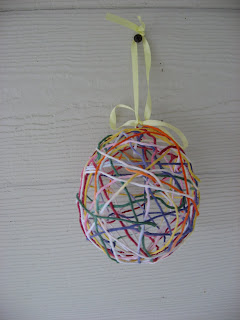
Easter Egg

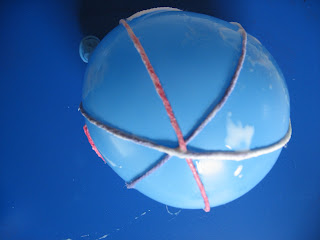
- Gather your materials. You will need glue, yarn , a balloon and some ribbon.

- Blow up your balloon a little ways and tie it.

- Cut some yarn in about 12 inch pieces. For this craft I used about 20 , 12″ pieces total.

- Mix your glue with a tiny bit of water if you want, this made it easier to soak the yarn but it took longer to dry. Either way works- just don’t dilute it too much.
- Start drenching the yarn in the glue

- Laying it on the balloon. Criss cross it over the whole thing.
- Keep going…and going.

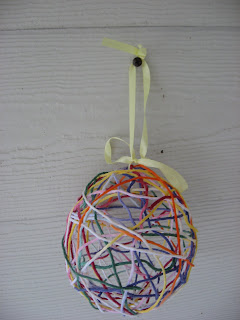
- When you feel it’s done let it dry , I prefer to let it dry by hanging it from a rack with a clothes pin. That way it’s not touching anything and won’t get stuck.
- When it’s dry carefully pop the balloon, and fish it out of the egg.
- Add your ribbon!


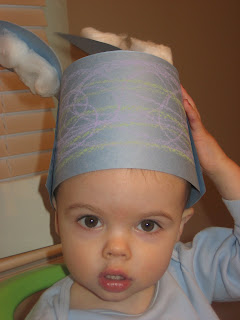
Bunny Ears Craft
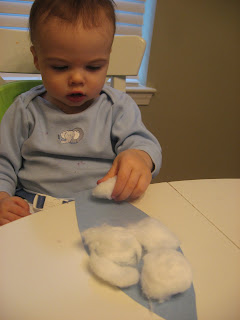
- Gather your materials. You will need 2 pieces of construction paper or card stock, some glue, cotton balls , double stick tape or a stapler and some chalk.

- Give your child one piece of the paper and the chalk to decorate it with. I use chalk because it gives a soft fluffy look , but don’t feel limited to that.
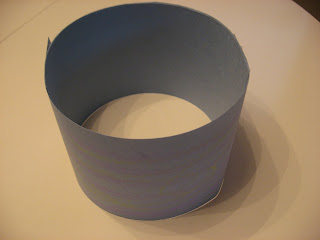
- While they color, fold the 2nd piece of paper in two .
- Draw a bunny ear, and cut through both layers.
- Using the glue attach the cotton balls to the ears. Let dry.
- While your child is gluing , take their colored piece of paper and cut in two lengthwise . Using double stick tape or stapler, create a headband that will fit your little bunny’s head. I don’t suggest glue, it’s too messy for this step.
- When the ears are completely dry attach them on either side of the headband! Again i suggest using double stick tape or a stapler for this step.


Easter Cupcakes

- Gather your materials. You will need cupcakes, icing ( any type will do) , orange wafer cookies ( vanilla) , and edible Easter grass.

- Start by making your cupcakes. I am so not a baker, mine come from a box more often than not.

- Cut your wafers in half and cut the corners off.

- Carefully slide edible Easter grass into the top of the wafer.

- Bake and cool the cupcakes.
- Ice.
- Press a carrot in the middle.

- Enjoy!


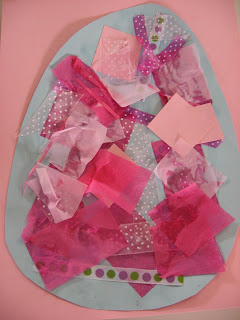
Collage Easter Eggs

This activity allows children to experience how different materials work with glue and paper. Although simple to adults, children can learn many things about texture, thickness and any other attributes that the chosen materials have. Don’t limit yourself to tissue paper, use ribbon, rice, dried beans or pasta even. Older children can even make patterns !
- Gather your materials. I used 2 different thicknesses of paper ( tissue and card stock) , and a number of different ribbons for this egg. Having a small toddler I stayed away from pasta and beans since they can present a chocking hazard when uncooked. For the egg I used card stock, and of course you will need glue.
- Cut out a large egg shape out of card stock, or cardboard.
- Spread on some white glue.

- Start the masterpiece! While your child is placing the materials on the egg you can ask them about what they are doing, ask how the material feels, if it will need a lot or just a little glue to stick on , what color and shape it is… but remember not everything has to be turned into a parent/teacher directed learning experience. If your child thrives on this interaction go for it , but if they thrive on individual creative play, let them take what they need from this activity and follow their lead.
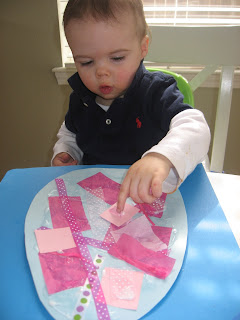
- Glue the egg on a large piece of paper if you want for a more finished look.


- Gather your materials. You will need some food coloring, milk, a paint brush, waffles ( lightly toasted), and an Easter egg cookie cutter.

- Mix your food coloring with a splash of milk, you don’t need much!

- Cut the waffle into the shape of the egg.

- Start painting.

- I made stripes.

- Toast and serve!
- Eat.

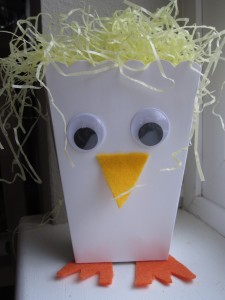
Easter Chick Treat Box Craft
- Gather your materials. You will need a party treat box ( we found ours at a big box store in their party section), some Easter grass, googley eyes, yellow felt , orange felt, scissors and permanent double stick tape.

- Cut a beak and 2 feet out of the felt.

- Tape them on.

- Tape the eyes on

- Put double stick tape along the inner edges of the treat box.

- Press Easter grass onto it.


fuente: no time for flashcards


